Maintaining the right oil level in your car is crucial for keeping the engine running smoothly. If your oil is too low, it can lead to serious engine damage. But how do you know if your oil level is right? In this article, we’ll explain how to check oil level in your car with easy DIY steps, and how understanding engine oil measurement can help you avoid costly repairs.
Discover Eco-friendly tires NYC for a greener, safer ride
Why Checking Your Oil Level is Important
Oil plays a vital role in your engine. It lubricates the moving parts, reduces friction, and helps cool the engine. Over time, engine oil can degrade, and you may lose oil due to leaks or evaporation. If the oil level gets too low, it can cause overheating, increased friction, and eventually, engine failure. Regularly checking your oil level can help ensure that your engine is properly lubricated and functioning at its best.
When to Check Your Oil Level
It’s important to check your oil level regularly, even if your car doesn’t show any signs of low oil. Ideally, you should check it once a month or before long trips. Additionally, you should check your oil when your car is parked on a level surface, and the engine is cool. It’s best to check the oil level before starting your engine or at least 10 minutes after turning off the engine to ensure an accurate reading.
Step-by-Step Guide on How to Check Oil Level
Here’s a simple, step-by-step guide on how to check oil level in your car:
1. Prepare Your Car
Ensure your car is parked on a flat surface and that the engine has been off for a few minutes. If the engine has been running, wait for about 10 to 15 minutes to allow the oil to settle. This gives you an accurate reading.
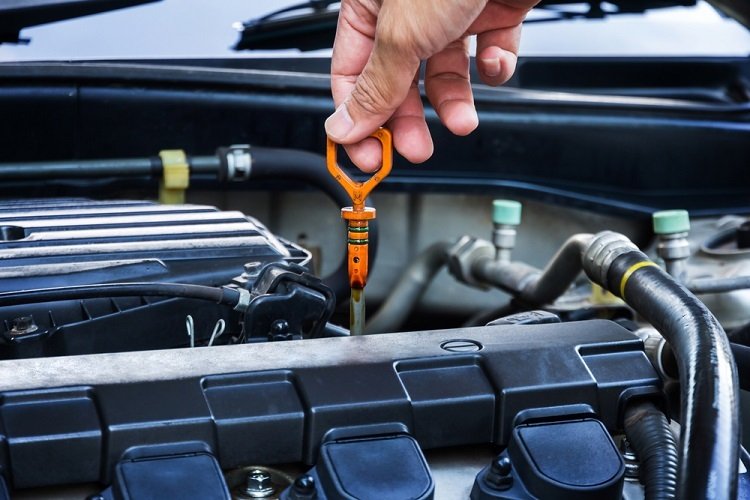
2. Locate the Dipstick
The dipstick is a long, thin metal rod that’s used to measure the oil level. It usually has a brightly colored handle, often yellow or orange, for easy identification. In some cars, the dipstick is located near the front of the engine, while in others, it’s located at the back. Check your owner’s manual if you’re not sure where the dipstick is.
3. Remove and Clean the Dipstick
Pull the dipstick out of the tube and wipe it clean with a rag or paper towel. Cleaning the dipstick removes any oil that may have splashed on it during the last reading and ensures an accurate measurement.
4. Reinsert the Dipstick
Insert the cleaned dipstick back into the tube all the way, ensuring it’s fully seated. Then, pull it out again to check the oil level.
5. Read the Oil Level
Now, it’s time to check the engine oil measurement. Look at the tip of the dipstick, which will have two marks (usually “L” for low and “F” for full). If the oil level is between these two marks, you’re good to go. If it’s below the “L” mark, it means your oil level is low, and you’ll need to add more oil.
6. Check Oil Condition
In addition to checking the oil level, you should also inspect the oil’s condition. Fresh oil is usually amber and clear, while dirty oil can appear dark brown or black. If the oil looks thick, sludgy, or gritty, it may be time to change the oil. If the oil smells burnt or has a strong odor, it could indicate a problem with the engine, and you should have it checked by a professional.
What to Do if the Oil Level is Low
If your oil level is low, you’ll need to add oil. Here’s how:
1. Purchase the Right Oil
Check your owner’s manual to find out the type of oil your car requires. The correct oil viscosity is important for maintaining optimal performance. You can buy oil from an auto parts store or your local gas station.
2. Add Oil
Remove the oil filler cap, usually located on top of the engine. Using a funnel, slowly pour oil into the engine, checking the level as you go. Avoid overfilling, as this can cause engine damage. Add small amounts of oil, then recheck the level using the dipstick until it’s within the proper range.
3. Close the Cap and Clean Up
After adding the oil, replace the oil filler cap securely. Clean up any spilled oil and dispose of any used rags or towels properly.
When Should You Change Your Oil?
Checking your oil level is important, but so is knowing when to change your oil. The oil in your car needs to be replaced periodically to maintain optimal performance. Most cars require an oil change every 3,000 to 5,000 miles, but newer vehicles may go longer—up to 7,500 miles or more—depending on the manufacturer’s recommendation.
In addition to following the mileage interval, you should change your oil if you notice any of the following signs:
- The oil looks thick or sludgy on the dipstick.
- The oil has a burnt smell.
- Your engine is making strange noises or running roughly.
- Your vehicle’s oil change light comes on.
Why Engine Oil Measurement Matters
Understanding engine oil measurement is key to maintaining your vehicle’s health. The dipstick provides a quick and easy way to check if your oil is at the right level and if it’s in good condition. Having enough oil is essential for engine lubrication, which prevents excessive wear and heat buildup. Regularly checking and maintaining proper oil levels helps your car run efficiently, improves fuel economy, and prolongs engine life.
Conclusion
Knowing how to check oil level is an essential skill for any car owner. By following the simple steps outlined in this article, you can ensure that your engine is properly lubricated and running smoothly. Regular oil checks help prevent major engine issues and ensure that your car is performing at its best. Don’t overlook the importance of proper engine oil measurement—keep your oil at the correct level, and your engine will thank you.
Explore Luxury car repair Beverly Hills for top-notch vehicle care